Share
Pin
Tweet
Send
Share
Send
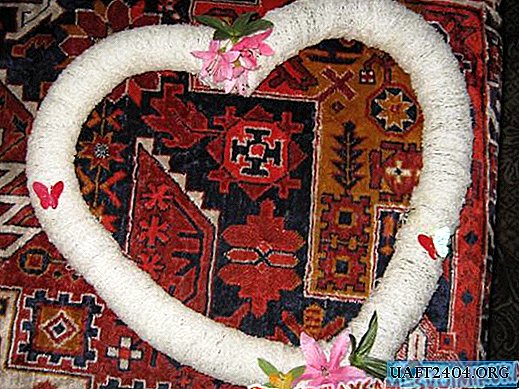
Materials for crafts:
2 long balls are taken as a basis. I chose dark colors, they clearly visible gaps.
To inflate, you definitely need a pump; without it, inflating them is very problematic. I used a car.
PVA glue. I went 2 bottles of 100 ml. If the glue is thick, it should be slightly diluted with water.
Threads with which we will wrap the balls. In my case, I used knitting threads. Threads are also suitable for sewing, it is advisable to choose a thicker one.
Decorative elements. I used sequin butterflies, and I borrowed flowers from a flower garland.
We can say that the preparation is over, now we are starting the creative process. We inhale and exhale and get down to work.
1. Take turns inflating two balls. We inflate the balloons to the end, we leave a small “tail”, which we then tie, forming a circle.


2. Now we proceed to the most interesting process - wrapping balls with threads. Frankly, I have gone a lot of threads. How to wind the thread, everyone decides how it suits him. This stage can be performed in two ways.
Method number 1. The balls can first be wrapped with threads, and then impregnated with glue. I did my masterpiece. If the glue is thick, it must be diluted with water. Liquid glue impregnates threads faster.
Method number 2. Thread the needle with which you will wrap the balls and pierce the bottle with glue at the very bottom, but not at the top, because glue decreases, and the thread must constantly be moistened with glue.

3. Having decided on the method of winding the threads, we proceed to the process itself. Ultimately, the balls look as follows. I first wrapped my valentine with thread, then soaked in glue. Before starting to wrap, I smeared a small portion of the ball with glue so that the thread could freely fix on the base. I leave the blanks to dry for a day.

4. After making sure that the glue is well dried, you can "destroy" the balls. Some craftswomen advise them to burst, but I just let them go and they were blown away perfectly, it remains to pull the tail and the whole ball in my hands. It turned out such a disgrace of thread.

5. Next, we proceed to an equally interesting stage - the formation of the heart itself. On the one hand, we make an incision to get something like a notch. In it we will put the second side of the heart. As soon as the desired shape begins to form, you can fix it with threads. Some craftswomen sew details. I chose wrapping.


6. We do the same with the lower part of the heart. Having fixed all the details, I impregnate the threads with glue. Leave to dry completely. That's basically it. The heart of ordinary knitting threads is ready. If desired, you can decorate it. I used sequins in the shape of butterflies, and artificial flowers with greens.

I wish you all good luck in the creative process and flight of fantasies!

Share
Pin
Tweet
Send
Share
Send

