Share
Pin
Tweet
Send
Share
Send
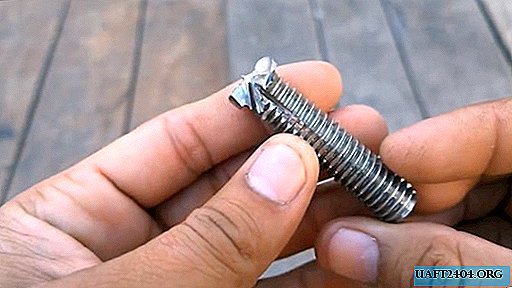
Imagine that you are facing a specific task: to make a dull hole in a tree under a bearing. To press it in, you need a certain diameter of the cutter, not the fact that a tool of this size will be in the store. Therefore, it is easier and cheaper to do it yourself.
Will need
We need only two M8 bolts and a washer with an outer diameter of 35-45 mm. By the way, the size of the bolt depends on the problem being solved. In our case, we select the future Forstner cutter tool for the holes for a small ball bearing. It must be fixed flush with the base plane. We also make a clamp for pressing the element into the wood.
So, let's arm ourselves with a power tool:
- Grinder (angle grinder) with cutting and grinding abrasive discs.
- Drill.
- Electric welding machine.
- Vertical drilling machine.
From a hand tool, we will need: a file, a marker, a caliper. Well, a desktop with a vise can be found in every workshop.
Homemade wood milling cutter (Forstner drill)
First, measure with a caliper the remaining distance on the cap of the bolt relative to the mounted bearing. The size of the cap around the M8 bolt is 12.73-13 mm. The diameter of the handle is 11.60 mm, which allows it to be clamped in most modern drill chucks.
The hat will need to work under the diameter of the bearing. It is this part of the bolt that will be the working element of our cutter. For marking, it is best to use a thin contrast marker, the risks of which will be easily distinguishable on the metal.

We make the marking of the burr of the cutter. This will allow her to easily get rid of chips. Clamp the bolt in a vise, and with the help of a cutting wheel we make these cuts on the hat with a grinder.


We measure the diameter of the bearing.

To work the faceted head of the bolt to the circumference, it is necessary to turn our drill into a lathe. We clamp it in a vice, and the bolt is firmly fixed in the cartridge exactly in the center.


We fix the drill button in a constant mode of operation, and proceed to the processing of the bolt head. This process is constantly monitored so that the center of the bolt does not move and does not violate the uniformity of the triggered teeth. We set the grinding abrasive disc on the grinder and grind the edges to the circumference.

The end part of the cutter is also slightly removed, leaving only a small tip in the center. This detail is extremely important, since this type of milling cutter first finds a center during operation, and only then does the material start to operate with cutting edges and rims. It can be carefully modified with a file so that it is not inadvertently cut off during grinding.

The cutter is almost ready. It remains only to shape the cutting edges, and sharpen them.

Here is the result.


Now you can test the resulting tool on an unnecessary piece of wood. It works, and pretty good!

Blind hole:

And end-to-end:

The simplest clamp for mounting
We will make this device from the same M8 bolt and a washer suitable in diameter. We expose the bolt vertically on a metal surface, providing contact of the mass for electric welding. We put the washer on top in the center of the bolt head, holding it with pliers. We weld the center with an electrode, filling the zone of the inner hole of the washer.


We clamp the obtained clamp in a vice, and we clean it with a grinder (angle grinder). The back part can be passed with a brush-nozzle for a drill.

We insert the finished clip into the chuck of a vertical drilling machine, and try to press the bearing into the wood. Such a simple device will save you from unnecessary efforts, and will accurately cope with such tasks.


Practical tips
This life hack has one weakness. It is more suitable for quickly solving a short-term task, when there is no time to run to the store or to the market. Since for steel products like bolts ordinary steel is used, and not tool steel, such a milling cutter is provided with quick wear. However, its life can be prolonged by tempering it at home, for example, with a propane burner or in a blacksmith workshop.
Also, in order not to get confused in the configuration of the cutting part of the cutter, its grooves, their direction, you can take as a basis the photo of the finished cutter from the Internet. These cutters are most often used for holes for furniture hinges.
Although this homemade tool can be used infrequently. But for its manufacture you will not spend a lot of money, and when needed, it will always be at your fingertips!
Share
Pin
Tweet
Send
Share
Send

