Share
Pin
Tweet
Send
Share
Send
So, for the manufacture of this kit we will need to take:
• A violet cadstock leaf 30 * 30 cm in size;
• Scheme boxes;
• Watercolor paper, A4 sheet, you can even half it;
• Scrapbook paper measuring 20 * 20 cm from the Provence collection by designer Evgenia Kurdibanovskaya and a sheet 30 * 30 cm from the French Travel collection, they are of similar tones and with a similar pattern;
• Pictures with peonies, roses and tulips in violet colors;
• Paper cut-out napkins white and light purple;
• White cut branch;
• Stamped inscriptions in dark pink "Happy Birthday" and a tint pad with the same color;
• Purple cotton lace;
• Rose latex white;
• Stamens with glitter violet and white;
• Hydrangea white-violet 3 pcs;
• White cut down petals;
• Half-beads mother-of-pearl pearl 4-5 mm in diameter;
• Purple buttons;
• Tools: simple pencil, scissors, glue stick, thermal gun, ruler, double-sided tape.

We take the scheme, the cadstock sheet and we will completely transfer the scheme to cardboard. First, cut off the size we need 24 * 28 cm.


We make all the bending lines thanks to the end of the scissors and the ruler.


We get here such a basis for the box, wrap all sides, forming a box.


For a postcard, we need a base from watercolor paper, we cut out the blank and fold it in half, we get a ready-made base of 8 * 15 cm. Now we turn to scrapbook paper.


For the postcard, cut out two rectangles of 7.7 * 14.5 cm.


One immediately glue on the back of the base, and the front will be decorated. For the box, we cut out such blanks as in the photo.


Part of the scrap blanks will be glued to the base, and the rest will be decorated.


We stick all the narrow ones, except for two short internal ones, we will stick them at the end when we assemble the box.


We decorate three rectangles with napkins, cut in half, pictures and inscriptions. We glue everything on double-sided tape.


We sew each rectangle separately, and then glue it on the box and postcard.


Sew a card in front and back. And we sew the box on the outside of the lid and sides. Now we collect and glue the box on the tails with a glue stick.


Now we glue the scrapbook paper sides inside. The box closes and is ready.


Now we decorate both the box and the card with a similar decor.


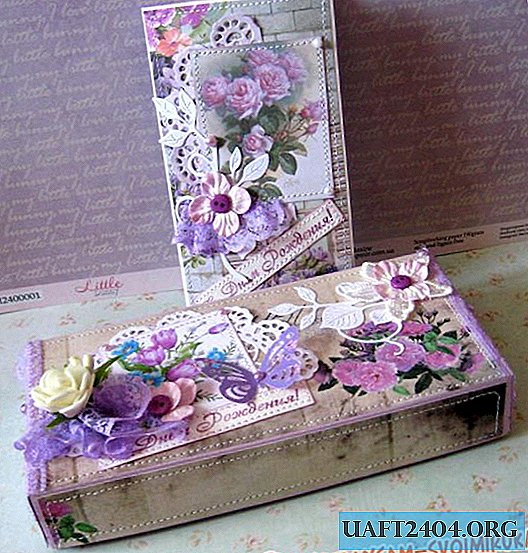
Done, we get such a pale purple dial.


It turned out beautifully, gently and in an original way. Thanks for your attention!


Share
Pin
Tweet
Send
Share
Send

